Guide to installing MicroChecker on modern computers
2014-06-05
I recently ran into a great deal of trouble installing MicroChecker on a Windows 7 PC that we are using for paternity analysis. In speaking with a few colleagues I discovered this was something many people I know have been struggling with.
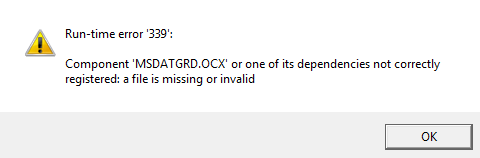
As far as I can tell, MicroChecker depends on several libraries that were available either in older version of Windows or Office at the time of the last release (almost a decade ago) but do not seem to be installed on more modern versions. The included manual for MicroChecker suggests that the program should run directly out of the unzipped directory, but this was not my experience. Whenever I tried to run StartMicroChecker.exe I kept getting the error message “Component ‘MSDATGRD.OCX’ or one of its dependencies not correctly registered: a file is missing or invalid”
There are several SETUP files in the main directory as well, but I couldn’t get any of them to run. However, in the Applications/ sub-directory, there are many files with .ocx and .dll extensions, including the irksome MSDATGRD.OCX. I found that you can manually register these libraries from the command line in Windows 7 if it is running in administrator mode. The process is described on this Microsoft help article.
Because this took me an embarrassingly long time to figure out on my own, I thought I would illustrate the process below in the hopes that I could save others a similar struggle in the future.
Note: the following describes the process I used to install MicroChecker on our lab’s PC. I followed instructions I found on the official Microsoft Support site, but I can not provide any assurances that following these directions will not harm your computer. It is possible that installing libraries as I describe will break other programs that share those dependencies. Back up your files first and proceed with due caution.
Open the Start Menu, and type “cmd” into the search bar at the bottom.

Right click the “cmd” program, and select “Run as administrator.”

In the command prompt, use the command “cd” to change the directory from C:\Windows\system32 to the directory where you unzipped MicroChecker (in my case the command I used was “cd C:\Users\BrodieLab\Downloads\MicroChecker\Application")

In the MicroChecker\Application directory, type the command “dir” to get a listing of all of the files in the directory. You’ll notice a large number of files that end in .dll and .ocx. These are all libraries that are required for MicroChecker to run (more detail from wikipedia). Notice that MSDATGRD.OCX from the error message above is among them. Registering just that file was not sufficient to get MicroChecker running–I had to register them all.

Again, from this Microsoft help article, you can manually register .ocx and .dll files using the command
Regsvr32 /s FILENAME.OCX
where you replace FILENAME.OCX with each of the files that end in “.dll” or “.ocx” in the MicroChecker/Applications/ directory. The full list of these files that I registered is:
- ASYCFILT.DLL
- COMCAT.DLL
- COMCT332.OCX
- COMDLG32.OCX
- DAO350.DLL
- hhctrl.ocx
- itircl.dll
- itss.dll
- MSADODC.OCX
- MSBIND.DLL
- MSCOMCTL.OCX
- MSDATGRD.OCX
- MSEXCL35.DLL
- msjet35.dll
- msjint35.dll
- MSRD2X35.DLL
- msrepl35.dll
- msstdfmt.dll
- msvbvm60.dll
- msvbvm60.dll
- MSVCRT40.DLL
- OLEAUT32.DLL
- OLEPRO32.DLL
- RICHED32.DLL
- Richtx32.ocx
- scrrun.dll
- VB5DB.DLL
- VB6STKIT.DLL
- vbajet32.dll
This is moderately laborious, but I’ve successfully used this process to install the program on multiple computers. Hope this was helpful.
–Brian